
Wednesday, August 28, 2013
Tuesday, August 27, 2013
Altered Binder Clips
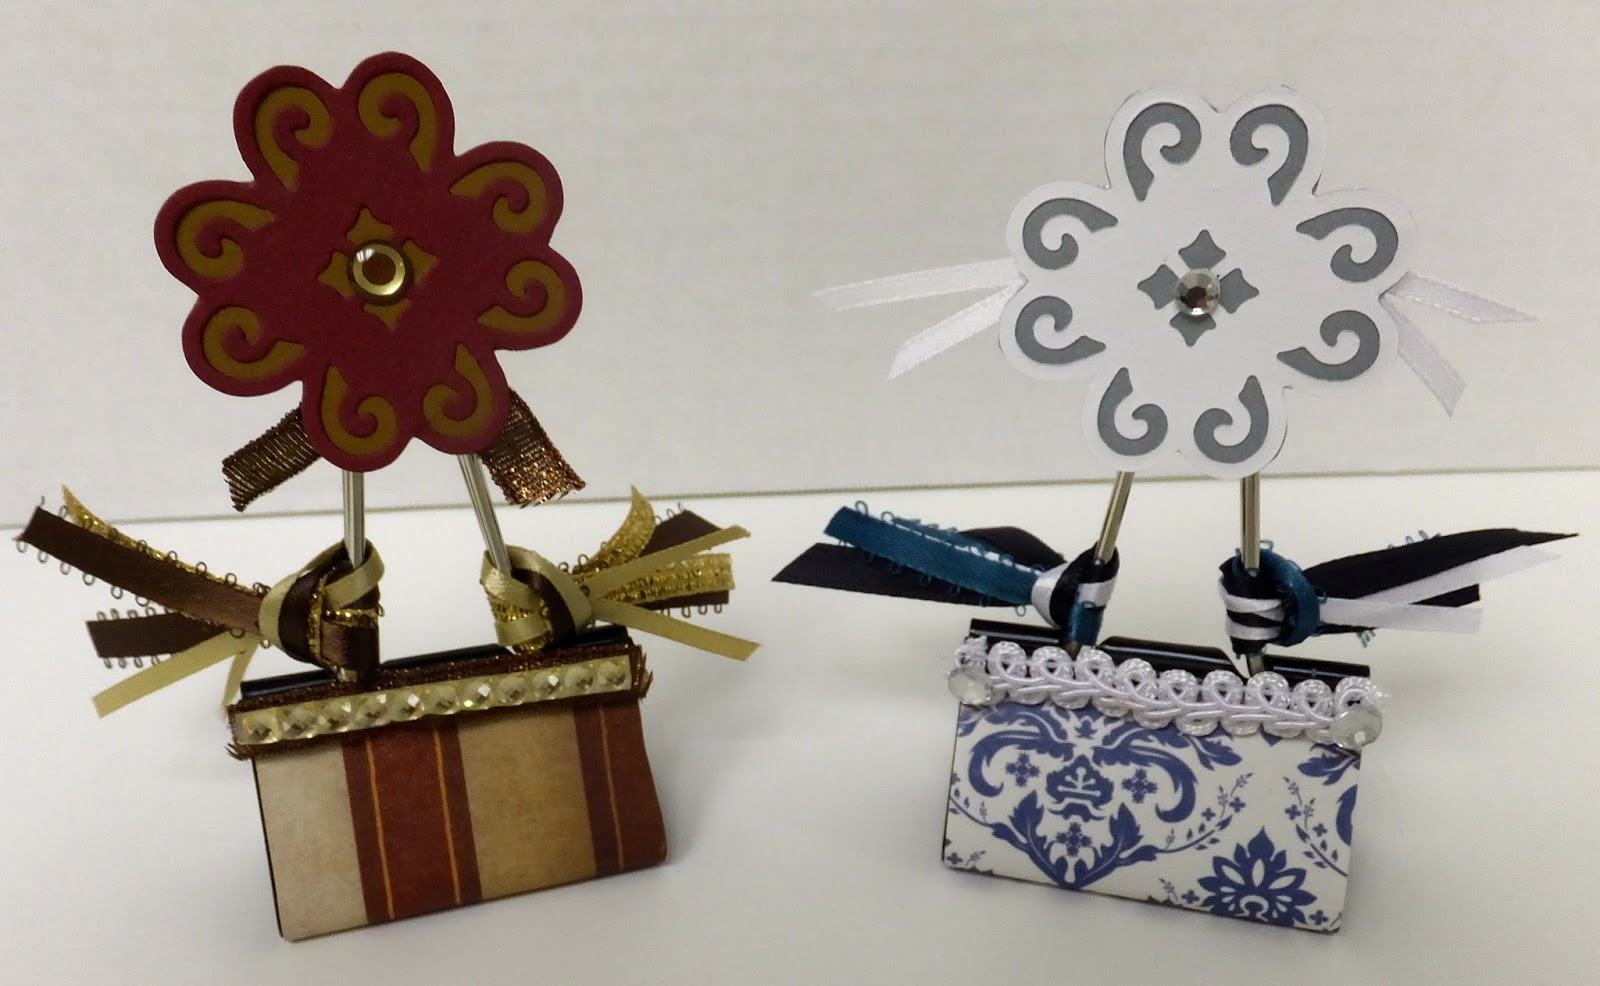
I used for the base large binder clips (you can get them from Walmart, Staples or sometimes even the Dollar Store)and it literally took my just a few minutes to make a dozen name tag holders.
Here is what you need:
- large binder clips (color does not matter, since you will cover most of the clip with paper)
* you also can use smaller binder clips, I just had the large ones handy
- decorative paper or solid paper (it's totally up to you)
- Glue Dots lines
- precision point adhesive
- misc. embellishments (ribbons, adhesive rhinestones, die cuts...)

Instructions:
- Cut a 8.5cm X 5cm piece of paper (if you use smaller binder clips, you need to adjust the size of the paper accordingly)
- Use the glue lines and glue them to each side of the paper and add 2 extra lines to the middle of the paper.
- Glue the paper to the base of the binder clip.
- Now you can decorate the clip with anything you want. I like to cut a few pieces of ribbon and knot them to both sides of the metal hook. For my name tag holders I used flower die cuts, which I decorated with adhesive rhine stones.
And that's it!
These are really easy to make and what I love especially is, that you can use them for many occasions:
- Place card holder (weddings, baby showers)
- Recipe holder
- Photo holder (for your desk for example)
- Gift card holder
- Dinner table place card holder (Christmas, Thanksgiving)
- Party favors
- Stocking stuffers
- Thank you note
Enjoy!


Thursday, August 1, 2013
Card Of The Week (Sweatshirt w/ Zipper)
It's time for this weeks card of the week.
This is currently my ultimate favorite card design. You can completely change the look, but simply using patterned paper.
I bought this stamp from "Too Much Fun Rubber-stamps"at a craft fair a few weeks ago. They also have an online store, which you can find here:
http://shopping.toomuchfunrubberstamps.com
I absolutely love the surprise effect with the integrated zipper. Of course you also could make the card without the zipper, but I personally prefer it with the zipper since it's so unique.
Front Of Card With Closed Zipper:

Front Of Card With Open Zipper:

Card Inside:

Subscribe to:
Posts
(
Atom
)